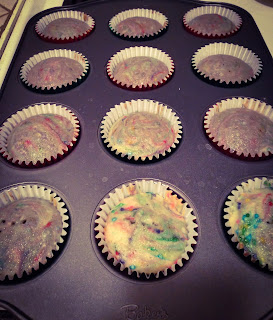
Tuesday, December 31, 2013

two times tuesday - new years eve edition - inside out chocolate chip cookies

I had a tough time deciding on whether or not to bake muffins or cookies for the New Year's Eve "party" we're going to.  It's not really a party, just a get together with a few people.  A friend of ours and his fiancée just bought a house together and wanted to have a low key get together.

Anyway, in the end, I decided to bake cookies instead of muffins, since for the most part, (when I put the correct ingredient in), my cookies come out so much better than my muffins.  They're also easier to bake and are more forgiving than muffins.  Not only that, but no one says no to a cookie.   Well actually my nurse did the other day - she just doesn't know what missing.

So here we are with another cookie recipe:

I'd say these cookies came out huge!  Not only that, but it was hard making the balls because of how much the dough stuck.  My hands collected a lot of the dough as well.  It could have been because I added too much milk in the dough.  She stated for 2 tablespoons, no more, or less, but I had to add in about 2 tablespoons more because the dough would not stick at all and was mostly powder.


Items you will need:
large mixing bowl
mixer
medium mixing bowl
large spoon
plastic wrap
cookie sheets
parchment paper

Ingredients you will need:
1/2 cup of unsalted butter, room temp
1/2 cup of granulated sugar
1/2 cup of dark or light brown sugar (I had light brown on hand)
1 large egg
1 teaspoon of vanilla extract
1 cup of flour
1/2 cup + 2 tablespoons of cocoa powder
1 teaspoon of baking soda
1/8 teaspoon of salt
2 tablespoons of milk
1 and 1/4 cups of white chocolate chips

Prep & cooking:
1. In medium mixing bowl using a mixer, cream butter (you'll need to scrape down the sides a bit).
2. Add in the sugars and mix.
3. Add in the egg and the vanilla, use the spoon to scrape down the sides as needed.
4. In a large mixing bowl, toss the flour, cocoa powder, baking soda, and salt together.
5. Slowly add the wet ingredients to the dry ingredients.
6. Now add in the milk, but stir it in, do not use the mixer for this part.
7. Fold in the white chocolate chips.
8. Chill for two hours, at least.
*pre heat oven to 325 degrees*
9. Take out dough and allow to warm to room temp while the oven is heating up.
10. Line two cookie sheets with parchment paper.
11. Take about 2 tablespoons of chilled dough and roll into a ball.
12. Gently press some white chocolate chips on top if desired.
13. Bake for 12 minutes exactly.
14. Take out of oven and allow to cool on the cookie sheet while the next batch is baking.
15. Remove off cookie sheet and place in an airtight container.

Monday, December 30, 2013

monday fun day - red velvet cookies

I know I really should be more focused on Sophie's impending arrival, but I'm pretty nervous about Sophie's birth that I've taken to baking to distract me.  I enjoy baking more than I think people realize.  Since I've taken to spending my Saturdays at the bowling alley, I always bring baked goods with me and then pawn them off to people since they just sit at my house.  I know that when Sophie's born, I won't have nearly as much time to bake.  In this way I guess I'm like Kyle, where I realize that I won't have the time to bake as much when Sophie is born, I want to bake as much as possible before she's born.

I baked this recipe because I had all of the ingredients at home, and I wanted to bake.  This we've established, quite obviously.  Besides with Kyle at work, and the Saints game on (I don't have cable) it was a quiet night, well as quiet as it can get with two cats acting out with the impending birth of their newest "sibling."  I really should have finished packing my hospital bag, or doing something Sophie related, but baking (procrastinating) was much more fun.

I also had a doctor's appointment and brought some in (lame I know), but those women work hard, I thought it would be a nice way to start off the new year for them to have goodies.

Red Velvet Cookies I made red velvet cupcakes awhile back, I would say this was an easier recipe without the frosting.

AND LIKE A DUMBASS, I put the wrong ingredient in the batch.  I accidentally used baking powder instead of soda...good thing I only put half the amount of baking powder in (it required 1 teaspoon of baking soda), I put in 1/2 baking powder.

Items you will need:
large mixing bowl
mixer
medium mixing bowl
large spoon
plastic wrap
cookie sheets
parchment paper

Ingredients you will need:
1 and 1/2 cups + 1 tablespoon of flour
1/4 cup of unsweetened cocoa powder
1 teaspoon of baking soda
1/4 teaspoon of salt
1/2 cup of unsalted butter, room temp
3/4 cup of light brown sugar
1/4 cup of sugar
1 egg, room temp
1 tablespoon of milk
2 teaspoons of vanilla extract
2 1/2 tablespoons of red food coloring
1 cup of semi sweet chocolate chips

Prep & cooking:

1. Toss flour, cocoa powder, baking soda, and salt in the large mixing bowl.
2. Take another bowl and beat butter on high using mixer.  Scrape down the bowl as needed.
3. Add in the brown sugar and the white sugar until combined.
4. Add in the egg, milk and vanilla extract, scraping down the sides as needed.
5. Once mixed, add the food coloring and beat until combined.
*It will look REALLY red, but once it's mixed with the other ingredients, it darkens significantly because of the cocoa powder*
6. Pour the moist ingredients into the dry ingredients, and gently beat until a dough is formed.
7. Mix in the chocolate chips
8. Cover with plastic wrap and place in the fridge to chill for at least an hour.
*preheat oven to 325*
9. Take cookie batter out of oven and allow to warm up to room temp for about 15 minutes.
10. Line two cookie sheets with parchment paper.
11. Scoop about 1 1/2 tablespoons of dough and roll into balls (taller than wide).
12. Bake for about 10 minutes, and take out of oven.
13. As soon the cookies come out, use a spoon to press down the cookie and add in the chocolate chips on the top.  This will give it a slight crinkle top.
14. Allow to cool while the next batch is baking and then move to a container.

Didn't come out nearly as pretty as hers, but they never do and I've come to accept that my baked goods will never look as good as hers.  However, they taste freaking awesome. Kyle had two the other day while he was cooking food.  He wolfed them down.


Friday, December 27, 2013

festive friday - fudge brownie cupcakes with cookie dough frosting

I definitely cheated with this recipe.  All I had to do was make the brownie cupcake, as I had previously made the frosting the night before for the Chocolate Chip Cookie Dough Sandwiches .  Unfortunately, Kyle wasn't able to frost the fudge brownie cupcakes because he had to go to work early to make up some hours.  So they didn't look real pretty when I frosted them, but hell, who cares what they look like when they taste like heaven?

I actually didn't have him bring all of the cupcakes as I did want one for myself, okay a few.  I'm pregnant okay!  We have cravings.  Although I'm seriously trying to not gain anymore weight in the rest of this pregnancy seeing as I already feel like a whale.

The nice thing about this recipe is, it was easy to make (well if you half of it made), with 7 ingredients for the brownie and 7 ingredients for the chocolate chip cookie dough frosting, and with some of the ingredients in both recipes.

Fudge Brownie Cupcakes with Cookie Dough Frosting

Items you will need:
for the fudge brownies:
cupcake tin
reynolds cupcake liners
sauce pan
spoon
spatula
large mixing bowl
pam baking spray

for the frosting:
mixer
medium mixing bowl
large spoon

Ingredients you will need:
for the brownie cupcakes:
4 ounces of Ghirardelli semi sweet baking bar
1/2 cup of butter, cut in cubes (easier to melt)
1 1/4 sugar
1 teaspoon of vanilla extract
3 large eggs
3/4 cups of flour
1/4 teaspoon of salt

for the cookie dough frosting:
1/2 cup of unsalted butter, room temp
3/4 cup of light brown sugar
1 teaspoon of vanilla extract
1 1/4 cup of flour
1/2 teaspoon of salt
1/4 cup of milk
1 cup of mini chocolate chips

Prep & cooking:

*pre heat oven to 325 degrees*
**line a cupcake tin with liners.**
for the cupcakes:
1. Melt Ghirardelli baking bar and butter together in a sauce pan, stirring until completely combined.  With the butter cubed, it shouldn't be too long, but make sure to keep an eye on it.
2. Once completely melted, remove from heat and move into a mixing bowl.  Use the spatula to make sure all of the chocolate butter mix is poured into the mixing bowl.
3. Add in the sugar and whisk in completely.
4. Add in the vanilla and whisk in completely. The mixture will be gritty.
5. Add in the eggs, 1 at a time, mixing well after each addition.  After the egg addition, the mixture will become less gritty and slightly thicker.
6. Now mix in the flour and the salt, the batter will be thick.
7. Using the spoon, spoon the batter into the cupcake tin, and using the other spoon, make sure that it scrapes of the batter on the spoon.
8. Bake for 20-23 minutes, mine took about 22 minutes. You do not want to over bake the brownies cupcakes.  Even if it looks a little soft, sitting in the warm tin will help warm up the rest of the brownie without burning it.

for the frosting:
9. In a large mixing bowl, beat butter until creamy.
10. Add in the brown sugar and mix, you will need to scrape down the sides of the bowl with a spoon
11. Add in the vanilla, flour, and salt.
12. Beat everything until completely mixed.
13. Now add in the milk and beat until mixed in.
14. Beat for about 2 minutes to make sure everything is completely mixed in.
15. Gently fold in the chocolate chips, and set aside at room temp until ready to use. If you don't plan on making the cookies the same day place in fridge. Make sure to take out at least 30 minutes before to allow it to warm up to room temp so that it's easier to spread across.

Cupcakes before they're frosted
My fudge brownie cupcakes got the crinkle top I've always wanted!  I don't know how, but it's amazing and it looks great.  I had to show a picture before I frosted the cupcakes.  It took a lot of self control to not eat the cupcakes as I was frosting them because the frosting tasted great, and the cupcake itself tasted great.

I brought some into Kyle's work so that they could have a taste as well and so I wouldn't eat all of them.

Didn't have my handy dandy froster :(


Thursday, December 26, 2013

Tasty Thursday - chocolate chip cookie dough sandwiches

I kind of cheated on this recipe.  On Christmas day, I baked these cookies (5 C's) and since I already had the cookies made, I decided to make the frosting for these and just have them together.  It's still basically the same recipe, I just made them on separate days.  Still tasted awesome!  I mean really awesome.

The other night, Kyle wanted something to eat, but it was 4am (that's what happens when you have a night job), and he said it was way too late to be cooking something, even though it's not like he would be disturbing me, since I was passed out, so he went ahead and just ate one of the cookies I made instead.  That's how good my cookies are.

I actually saw this recipe awhile back, but because I've been busy getting ready for Sophie, I just didn't have the time to sit down and make the entire recipe in one go.  The nicest thing about this recipe?  The frosting is egg less! So people who love to eat cookie dough, but can't eat the raw egg?  This is for you, and if you're pregnant like me, you shouldn't be eating raw anything anyway.  I would also have to say that I added way more than 1/4 of a cup of heavy cream, it was probably close to a cup because I wanted to use all of the rest of the heavy cream I had left.

I didn't have two cookies per sandwich, I just had it more as a topping instead, cuts down on the calories and how quickly the cookies go, especially since half of them went to Kyle's work so I wouldn't sit and eat all the damn cookies, and because of how much of the frosting I had, I actually made one more Chocolate Chip Cookie Dough recipe (see Festive Friday's Fudge Brownie with Chocolate Chip Cookie Dough Frosting).


Items you will need:
for the cookies:
large mixing bowl
mixer
large spoon
medium mixing bowl
plastic wrap
2 cookie sheets
parchment paper

frost the frosting:
large mixing bowl
mixer
large spoon


Ingredients you will need:
for the cookies:
2 cups of flour
2 teaspoons of cornstarch
1 teaspoon of baking soda
1/2 teaspoon of salt
3/4 cup of unsalted butter, softened to room temp
3/4 cup of light brown sugar
1/4 cup of sugar
1 large egg, room temp
2 teaspoon of vanilla extract
1 cup of mini chocolate chips

for the frosting:
1/2 cup of unsalted butter, room temp
3/4 cups of light brown sugar
1 teaspoon of vanilla extract
1 cup of flour
1/2 teaspoon of salt
1/4 cup of milk (or heavy cream)
1 cup of mini chocolate chips

Prep & cooking:
for the cookies:
1. in the large mixing bowl, use the hand held mixer and beat the butter for 1 minute until completely smooth and creamy
2. add the brown sugar and sugar and mix until medium speed until fluffy and light in color.
3. add in egg and vanilla, make sure to scrape down the sides and bottom of the bowl as needed.
4. in another bowl, combine the flour, cornstarch, baking soda and salt, mix the ingredients.
5. slowly, mix in the wet ingredients until combined.
6. add the chocolate chips and mix until evenly disbursed.
7. place in the fridge to chill, for at least two hours.

for cookie dough:
8. in a large mixing bowl, beat butter until creamy.
9. add in the brown sugar and mix, you will need to scrape down the sides of the bowl.
10. add in the vanilla, flour, and salt.
11. beat everything until completely mixed.
12. now add in the milk and beat until mixed in.
13. now beat for about 2 minutes to make sure everything is completely mixed in.
14. gently fold in the chocolate chips, and set aside at room temp until ready to use. If you don't plan on making the cookies the same, day place in fridge.  Make sure to take out at least 30 minutes before to allow it to warm up to room temp.

baking:
*pre heat oven to 325 degrees*
15. take the cookie dough from the fridge and allow to warm up to room temp for about 15 minutes.
16. line two cookie sheets with parchment paper
17. roll the cookie dough into balls (taller than wide) - using about 1-1 1/2 tablespoons of dough
18. Bake for about 10 minutes
19. Take out of the oven and allow them to cool on the cookie sheet, before removing them and allowing them to cool on something else.

The chocolate chip cookie dough frosting

I could have easily eaten all of this chocolate chip cookie dough frosting, seriously, it was delicious.  This is egg less, and seriously simple to make.  I actually used heavy cream since I had it on hand, rather than milk, since I wasn't sure if the milk I had was actually going bad or not.

See how freaking delicious this looks?
I would have eaten all of these but I had to exercise some self control, I do not want to weigh in at 8590438 lbs at my next appointment.  So the cookies and the the recipe I am making went to the bowling alley.

2014

We have one last major holiday before Sophie's arrival, and that's New Years Eve.  Kyle and I are both getting very nervous and anxious about her birth.  We want her to come, but we realize that the sooner she comes, the less time we have together as a couple without a baby.

Last year, I went to a neighbor's house (mostly because they had awesome food) and because I brought over a bottle of booze, which could have counted as an invite since they love booze.  I actually didn't know them that well, even though I had been their neighbor for 6 months (funniest thing, I actually started working with one of them in February of 2013).

It was really nice because it was a few minutes from my house, if I wanted to get drunk I could (just walk home, no driving involved there), if I got cold, just run back to home and get some warmer clothes on, and if I got tired, just walk back home.  See what I mean?  Great place to go party at.
Not only did I get to see a firework show, I met a lot of the neighbors that I had been living around for the past 6 months.  Not only did they shoot off fireworks, they set their Christmas trees on fire.  Something that I had never seen before, not sure if that's a tradition down here or not.

If we're invited to the same neighbor's house, it will be a "wonderful" experience this time around because:
1. I'll be pregnant.
2. I won't be able to eat as much as I could.
3. I could go into labor at their party.
4. Anything could happen.

I'll be a lot closer to my due date this time around.  She's due in 2014, and honestly we kind of hope it's sooner in 2014 than later.  Who knows, she could be a New Years Eve baby, I know Kyle's mentioned it.  I doubt this, because babies come on their own schedule, and if she's anything like her daddy, she'll come on her time, but if she's like me, she'll come early.  Let's hope early.

So here's to


The start of a brand new year and brand new adventures with our daughter.

Wednesday, December 25, 2013

thirty-six weeks

M e r r y C h r i s t m a s ! ! !

It's Gaby's birthday so he was allowed to be in the picture.
How far along? 36 weeks
Total weight gain/loss: 25+ lbs
Maternity clothes? duh.
Stretch marks? yeah.
Sleep: Woken up a couple of times with Braxton Hicks
Best moment this week: Sitting on my ass and being paid to do it (paid vacation time).
Miss Anything? Doing whatever the heck I wanted.
Movement: She has run out of room, but still insists on moving in there
Food cravings: Appetite has been going in and out.  I seem to just want to eat cookies...and candy.
Anything making you queasy or sick: Smells.
Gender: Girl
Labor Signs: Can we say ready to give birth?
Symptoms: Uncomfortable has a brand new meaning.  I'm seriously sick of everyone saying I'm about to pop...shut up.
Belly Button in or out? Kyle predicts if I go full term it will pop.
Rings on or off? Off
Happy or Moody most of the time: Excited to meet our girl, but tired of being pregnant.
Looking forward to: giving birth

So how did Kyle and I spend our first and last Christmas together as a couple?

Well, we basically sat at home in our PJs, watching funny movies/documentaries on Netflix.  We didn't even leave the house or get dressed.  Yeah, seriously, sat around in our pajamas- it was nice.  Yes we did shower, because that's kind of gross sitting in your filth all day.  The baking bug did bite and I made some Chocolate Chip Chunk Cookies because I can.  I didn't bake it for anyone, and we weren't seeing anyone today, I just wanted to bake something.  Even though I had baked earlier in the week (the cheesecake brownies).  I had all of the ingredients for these on hand, and it's a relatively simple recipe.


At 9 months pregnant, and the marathon Christmas Eve house hopping we did yesterday, I was looking forward to just hanging out at the house having a quiet lazy day.  Most likely, next year I'll insist that we just stay at home both days and if my mom and his mom want to visit our house they can, because toting around a nearly 1 year old child is not my idea of fun.  Besides, I'm sure Sophie will be more interested in opening presents then seeing her grandma.

We actually opened our presents last night.  We gave each other more practical gifts (no engagement rings given over here), neither of us are romantic per se, but the gifts we gave we used immediately.  For him it was pajama pants, and deodorant (no he doesn't stink, I just noticed he was almost out) and for me it was a laptop desk that can rest on your lap because I'm always blogging.  I'm actually using it right now.  It's really versatile. I can use it to eat with, work on my laptop with, and apparently I can also write using it.  Haven't tried that one yet.  It's still really nice to have and to use.

Hope y'all had a safe and wonderful Christmas day!

Tuesday, December 24, 2013

two times tuesday - christmas eve edition - chocolate candy cane fudge

Candy Cane Chocolate Swirl Fudge

This is the perfect baking recipe for Christmas!  I actually brought this for Christmas eve for three different people's houses.  so I ended up cutting the pieces really small to be able to have enough for three houses, and some for my own and the bowling alley.

I'd say after making this recipe, it may have been easier to break up the recipe instead of combining it.  When melting the white chocolate chips with nearly 2 cups of condensed milk, it not only took forever, but also also came out kind of clumpy, something that I didn't expect seeing as when I made the mint chocolate chip fudge one, it came out smooth.

Items you will need:
sauce pot
9x13 baking pan
parchment paper

Ingredients you will need:
3 cups of white chocolate chips (2 packages of 12 oz bags)
1 Nestle sweetened condensed milk
1/2 teaspoon of peppermint extract
8 crushed candy canes ( or Andes peppermint crunch baking chips)
2/3 cups of mini chocolate chips

Prep & cooking:
1. Line an 9x13 baking pan with parchment paper and spray with baking spray.
2. Combine the white chocolate chips and sweetened condensed milk in a saucepan over medium heat.  Stir frequently until the chips are melted.  This may take awhile since it is 3 cups of white chocolate chips.
3. Remove from heat and add in the peppermint extract and the peppermint crunch
4. spread evenly into the pan.
5. Top with chocolate chips and gently swirl them into the fudge with a knife, and add on top some more peppermint crunch.
6. Let it cool down for a bit - place in the fridge for a bit, and then take out and make the cut marks (make sure not to cut through the parchment paper).
7. After you've made all of the cut marks, place in the fridge to chill completely for at least 2 hours.
8. After 2 hours, take out again, and finish the cutting, and place in the freezer over night.

I mad the mistake of letting this chill for about 3 hours, and cutting it into squares was so difficult.  It wasn't even funny.  I had actually candy cane pieces preventing me from cutting through completely.  So let's just say it was a task on this one, but the finished product still tasted good enough (really sweet for me so I won't be eating much of this one - I think my expanding waistline can appreciate that).


Monday, December 23, 2013

monday fun day - mint chocolate chip cheesecake brownies

So I didn't have work this week, but I still wanted to bake something...so I went ahead and baked these.  I know for a fact that Arthur and Sedric, two of Kyle's league bowler teammates would love this recipe.  So I knew that some of this would be eaten, and whatever isn't eaten by them, would be eaten by his co-workers (even though Kyle won't go into work until Thursday).  Although, this will be the last recipe that I intensely bake I think, because I'm getting to the point of seriously uncomfortable - being shy 3 days of 9 months would wear anyone out.


I feel like Roseanne Barr in the snicker's commercial (My back hurts).
Not only that, but when I do give birth, I won't have the time to be baking all of the time.  I'll have a child to watch, plus I don't need all of that rich calorie intense crap in my house.  Not when I'm trying to lose weight from being pregnant.


Items you will need:
for the brownies:
medium sauce pan
1 baking pan (9x13)
parchment paper
pam baking spray
mixing spoon
medium mixing bowl
whisk
large spoon

for the cheesecake swirl:
mixer
medium mixing bowl
large spoon
knife

Ingredients you will need:
for the brownies:
½ cup (1 stick or 115g) salted butter
8 ounces coarsely chopped semi-sweet chocolate
1 and 1/4 cups (250g) sugar
3 large eggs
1 teaspoon vanilla extract
¾ cup (95g) all-purpose flour
¼ teaspoon salt

for the mint cheesecake layer:
8 ounces (224g) cream cheese, softened
¼ cup (50g) sugar
1 egg yolk
¼ teaspoon peppermint extract
2 drops liquid or gel green food coloring
⅔ cup (120g) mini chocolate chips

Prep & cooking:
*pre heat oven to 325 degrees*
for the brownies:
1. Line the bottom and the sides of the baking pan with aluminum foil, allowing there to be an overhang and make sure to spray with Pam baking spray.
2. Take out the cream cheese and allow it to begin to soften to room temp.
3. Melt the butter and semi sweet chocolate in a sauce pan on medium heat, make sure to stir constantly so that it doesn't burn.
4. Once fully melted, remove from heat and allow to cool down for at least 15 minutes.
6. Stir sugar into this mixture until combined.
7. Add in eggs one at a time whisking smooth after every addition.
8. Now whisk in vanilla.
9. Using a spoon, gently fold in flour and salt.
10. Saving 1/4 of a cup of the batter, pour the rest into the pan.

for the cheesecake swirl:
11. Using the mixer, beat the softened cream cheese, ¼ cup of sugar, egg yolk, ¼ teaspoon of peppermint extract, and 2 drops of food coloring in a mixing bowl until completely smooth.
12. Stir in the mini chocolate chips.
13. Dollop spoonfuls of the cream cheese mixture on top of the prepared brownie batter.
14. Cover that with the last ¼ cup of brownie batter.
15. Glide a knife through this to help make the swirl.
16. Add in more chocolate mini chips if desired.
17. Bake for at least 30-35 minutes, check at 30 minutes.
18. Allow brownies to completely cool and refrigerate before cutting them into pieces.

*Taste the mint cheesecake mixture after you mix it - if it needs more peppermint flavor, add 1 more drop of peppermint extract. If you'd like it to be a brighter green, add more food coloring.*

How it should look swirled well ugly swirled, hers are much prettier.
I would say after cooking this recipe, that I would use the parchment paper instead of aluminum foil.  Much easier to work with and I don't have to worry about it sticking as badly as the aluminum foil did.  I also didn't use baking spray with this, so it stuck like a bitch.  I had to put it in the freezer over night, so that when we pulled it out the next day, the foil came over a bit easier.  Kyle and I spent 10 minutes pulling the aluminum foil off.


Still can't believe that I made such a simple mistake.  I've been baking for almost two months, and in that time I've baked 17 recipes, so you'd think I'd remember something as simple as that.  Oh well.


Friday, December 20, 2013

our first christmas

The other day I finally received the Christmas ornament I ordered.  It was really cute.  Kyle said it looked like two white men and a child - thanks a lot Kyle.  So maybe current catalog isn't the best with making the little ornament women look like women, and be racially conscious at the same time - big deal, it was cute.  It was the thought that counts.

I'm a little sad because not only is this our first Christmas together as a couple, it will be our last as a couple as well.  not that we're actually celebrating Christmas like many families do because of Kyle's religious preferences.  I'm not a believer in the Christian or Catholic faith, but he's buddhist.  Totally different religious views.

However, I stil like celebrating Christmas, I don't get too crazy with it, even when I'm not pregnant.  We'll be celebrating Christmas next year with Sophie as we do want her to know what Christmas is about.  I do wish we would have had more time as a couple before Sophie came into the picture, but that wasn't in the cards for us.  That's okay though, because as long as we're together that's all that really matters.

Her first Christmas will be a big deal, whether Kyle celebrates Christmas or not, I will make it a big deal.  It's her first Christmas and our first Christmas as a family, so we'll be doing something, even if it's just sitting around the house watching Christmas movies all day, she'll be almost a year old by then, and much more aware of the world at that time.
And of course, like any other bat shit crazy mom I'll have to have a Christmas outfit for Sophie to wear.


This is our little Christmas tree this year, nothing big or extravagant. I'm far too pregnant to be dealing with a real tree or a tree larger than this.  I did want to get a cute little miniature pine tree, but they were selling for $50 and I wasn't even sure if I wanted to plant this thing after Christmas.  Not only that, but we can't have anything outside in the public area of the house due to our asshole cats (well my asshole cats) wanting to get into everything.

One of the biggest things I want for a future Christmas tree is ornaments.  I have some ornaments at my mom's house and he has some at his mom's house.  I'd like our tree to be filled with ornaments from our childhood and the future ornaments we'll have as family.  The other day my mom posted a really good idea for ornaments.


We can make one for Sophie using either her hands or feet to make the ornament.  How cool is that?  We can even make one for every year!  I think it would be something nice for to have when she's older.  And it would be nice for us to see her progression, well at least for me it will be nice.

festive friday - peppermint bark

This is the last of the recipes I chose to make this week and let me tell you I'm glad I started with a non baking recipe and ended with a non baking recipe.  I'm pooped.  Not only did I have a busy/hectic week working, I was also baking every single night, so let's just say napping happened A LOT this week.

This is the last Friday before we go onto holiday break at my work, and this is kind of Christmas-y.  Whenever I think of peppermint (candy canes) or hot chocolate, it reminds me of Christmas.  I've actually made peppermint bark previously, however the last time I made it, it came out kind of fucked up looking.  So here's to hoping this doesn't look ugly as shit.  The nice thing is that it doesn't have to look pretty.  It's going to be broken up in pieces anyway.  But seriously, it doesn't need to look like Ghirardelli Peppermint Bark, because that stuff is just ridiculously pretty and overpriced as all heck.

I can't believe Christmas is less then a week away, and I can't believe that I'm nearly full term either.  Only a week and half before I am full term - meaning that Sophie could be safely born since her lungs are fully developed by 37 weeks.  I think Kyle and I are both ready for her to be born (me: I'm tired of having someone suffocate me from the inside, Kyle: he's tired of hearing me complain like a bitch).

Anyway, here we are: peppermint bark .

Items you will need:
1 cookie sheet
1 spatula
2 bowls or 2 saucepans
2 spoons
Aluminum foil

Ingredients you will need:
12 oz of Ghirardelli baking bars or 12 oz of Ghirardelli baking semi sweet chocolate chips
12 oz of Ghirardelli baking white chocolate chips (you can also use Tollhouse white chocolate chips)
8 peppermint candy canes (broken into pieces) or Andes Peppermint Baking Chips (much easier personally)

Personally myself, I find using baking chips and using Ghirardelli much easier to use, however, I only use them when they are on sale.  If they aren't on sale, I'll just stick with the Tollhouse or Nestle versions or the generic.

Prep & cooking:
1. Unwrap the candy canes and place them into a ziploc bag.
2. Break the peppermint by using a hammer (or something else just hard dense).  Or you could use a food processor.

*If you have the Andes Peppermint Baking Chips, skip to step 3.*

3. Prepare a cookie sheet by covering it with smooth aluminum foil.
4. Melt the dark chocolate either in microwave or sauce pan and pour it onto the prepared cookie sheet.  You may need to use a spoon to spoon it out.
5. Using the spatula, spread it across the cookie sheet to even it out (about ⅛ inch thick).
6. Place the cookie sheet in the fridge to harden up the chocolate.
7. Now melt the white chocolate with the microwave or sauce pan on the stove.
8. Once completely melted, pour out onto the chocolate and spread it out following the steps listed above.
9. Before the white chocolate has hardened, pour the peppermint pieces (or Andes Peppermint Baking Chips) onto the white chocolate make sure to push them down into the white chocolate. If you don’t, they will fall off when the chocolate has hardened completely.
10. Now place in the fridge for a couple of hours to harden up.
11. After it's had a couple hours to harden, make sure that they are harden completely before breaking it apart.  The pieces don't have to look even.  That's the nice thing about peppermint bark.

I have to say it came out looking a lot better this year than it did last year.  A lot better.  Not only that, but you can actually eat it without breaking your teeth, something I almost did with how thick the peppermint bark.  I seriously had to exercise some self control and not eat all of this as I was packing it away.

I'd recommend if you're not a big fan of being so sweet to use dark chocolate baking chips as your base or Ghirardelli baking bars as they are less sweet.  I don't mind it being that sweet, but there are some people who really don't like their candies being so sweet.

Thursday, December 19, 2013

tasty thursday

I've been on a mint chocolate chip kick lately.  This is my third mint chocolate chip related recipe, and I'm making one more this upcoming Monday.  The funny thing is?  I'm not really that big of a fan of baked mint chocolate chip goods.  I just really like the ice cream, particularly Edy's version.  However, it seems many people like baked versions of the mint chocolate chip.

I truly love baking, I probably wouldn't have started had I not been pregnant. My mom and I never really baked when I was growing up, just the traditional sugar cookies for Christmas and that was it.  Well, one day I just woke up and decided I wanted to bake.  I mean really full on bake, I've had to rearrange my entire kitchen to fit in all of the baking items I now need.  One day Kyle came home and couldn't find half the food because I moved into the laundry room pantry.

I have to say that Sally's Baking Addiction has so many recipes to try and bake that I've become a much better baker than when I started back in November.  I use her recipes, but improvise them to my own taste and liking (of course I always link back to her recipe to give the credit to her for thinking up the recipe).

Having Kyle and my co-workers, and our friends as my guinea pigs to try out my baked goods really help as well.  They can give me feedback and I can remake the recipe to change what they didn't like.  I still consider myself an amateur even though I've now baked over a dozen times.

One of the nicest things that Kyle has done throughout my baking banaza is help me frost the cupcakes or cake.  I'm terrible at frosting, I think it's because I don't have the patience or the skill really.

This next recipe is pretty simple, just a couple of time consuming steps, but it is worth it in the end.

Chocolate Cupcakes with Mint Chocolate Frosting

Items you will need:
for the cupcakes:
2 cupcake tins
reynolds cupcake liners
small saucepan
2 medium mixing bowls
whisk
large mixing bowl
1 mixer
large spoon
2 small spoons
1 spatula

for the frosting:
mixer
medium mixing bowl
spoon

Ingredients you will need:
for the cupcakes:
1 cup of water
½ cup of unsweetened cocoa powder
1 and 1/3 cups of flour
2 teaspoons of baking powder
¼ teaspoon of salt
½ cup of unsalted butter, softened to room temp*
1 cup of granulated sugar
2 large eggs
2 teaspoons of pure vanilla extract

for the frosting:
1 cup of butter, softened to room temp
3-4 cups of confectioner's sugar
3-4 tablespoons heavy cream
¼ teaspoon of peppermint extract
4 drops of food dye
pinch of salt as needed
2/3 cups of mini chocolate chips

Prep & cooking:
*pre heat the oven to 325 degrees*
1. Over high heat, boil the water in a small sauce pan ( or if you're lazy like me, heat the water up from the sink and pour that in).
2. In the medium mixing bowl, pour the unsweetened cocoa powder with the boiling water until smooth
3. Allow to cool to room temp by placing in the fridge to cool down.
4. In the large mixing bowl, use the mixer to cream the softened butter and sugar until light and fluffy.
5. Add in eggs, one at a time, and beat until smooth
6. Beat in the vanilla extract
7. Slowly add the flour mixture and beat until just combined.
8. Now add in the cooled cocoa mixture
9. Fill the cupcake tins 1/2-3/4s full and bake for 25-27 minutes, make sure to check at 20.  You do not want these to burn.  For my oven, it's not as new and fancy as many other ovens so my heat isn't always reliable.

At 325 degrees, my cupcakes took nearly 27 minutes to fully cook.  It may take less for your oven.

for the frosting:
10. Beat the softened butter on medium speed with the mixer.
11. Add one cup of confectioner's sugar and one tablespoon of heavy cream (you don't need exact measurements).  Make sure to follow this order.  It is much easier to blend this way.
12. Mix until it's completely blended.  Make sure to keep the mixer close to the base of the bowl and to move slowly, due to the confectioner's sugar it may be hard to blend at first, but the cream will help reduce how hard it is.
13. Scrape down any excess confectioner's sugar - there will be some due to the ratio of confectioner's sugar to the heavy cream.
14. Repeat steps 11-13 until you have enough frosting for the cupcakes.  I had 18 cupcakes, so because I wanted it to have a good amount of icing on top (since it had mini chocolate chips in it), I had about 4  cups of confectioner's sugar and 4 tablespoons of heavy cream.  Let's not think about how many calories that is in just that part.
15. Make sure to blend the frosting completely and then add in the peppermint extract.  Depending on how minty you like it, you can add more or less.  Personally myself I didn't want it to be overpowering so I stuck to the 1/4 of a teaspoon but I bet it would be fine at 1/2 or even 1 teaspoon.
16. Blend, until the peppermint extract is fully mixed in.
17. Now add the dye.  I used about 4-5 drops to make it the mint green color, but you can add more or less depending on how dark or light you want it to be.  (I use the small dropper that comes in the assorted pack, so for the green dye by itself, it may only take 2 drops).
18. Completely blend in the dye, so that the entire frosting looks green, and then add 1/3 of the mini chocolate chips.
19. Blend completely, and add in the second 1/3 of mini chocolate chips.


*One thing that I struggled with for the longest time in Sally's recipes, was how to get softened butter in a timely fashion.  Originally I thought that taking it out and waiting for an hour to warm up would be best, but it didn't really work.

One of the oddest things about my oven is while it's warm and heating up one of the burners warms up as well.  It used to bother me, but now it's come in handy.

What I do now is, I take it out before I start the prep & cooking and allow it to warm up.  After it's been warming up, I cut it into 8ths (if it's full stick of butter), and place four slices in a metal mixing bowl and place it on the burner for a few minutes and allow it to slightly melt then mix it using the mixer, it is much easier.  Then I add in the next four slices and mix it a bit more.  The only reason why I do this is because she suggests to mix the butter first before placing the other ingredients in.*


I've learned the hard way if you fill a cupcake tin a little more than 3/4ths of the way, it will balloon over and just look plain ugly.  So I've had to master the technique of knowing what is too much and what is too little.  The unfortunate thing is, they still look kind of ugly in the cupcake tin before they actually bake.Yet see how pretty they came out despite looking ugly before being baked?  That's right, despite my terrible skill in filling the cupcake pan, the oven makes it look all better.

Personally myself, the frosting came out really well this time, even though it was a thicker frosting due to it being heavy cream that was used instead of milk.


And the finished product, Kyle got a little crazy with the frosting, so it ended up looking like this.  Not the best, but still better than my shitty attempt.


Wednesday, December 18, 2013

winning wednesday

This original recipe was a cake, but I made cupcakes out of it because I wanted to use my new cupcake carrier! This is the Two Times Tuesday recipe Funfetti Cupcakes .

Seriously, this tasted better than the Pillsbury version - you really can't taste the difference between the homemade and the store bought.  Mine came out a lot darker, since I accidentally whisked the sprinkles in a bit too much and it bled into the batter.

It takes time to make this recipe, but it's a simple recipe.  The original recipe said it would only make 12 cupcakes, I made 24 cupcakes and then some.  It also stated to use greek yogurt - I didn't realize when I started that Kyle had eaten all of the greek yogurt, so I had to use sour cream instead.  I also didn't have heavy cream, so I had to use a substitute (see below for how to make it).


I would almost call this my fuck up recipe.  I swear I forgot half the ingredients that I needed or didn't have enough and had to go to the store multiple times just for this recipe.

Items you will need:
for the cake:
2 cupcake tins
medium mixing bowl
large mixing bowl
whisk
large spoon
aluminum foil

for the frosting:
mixer
medium mixing bowl


Ingredients you will need:
for the cupcakes:
1 and 2/3 cups of flour
1/2 teaspoons of baking powder
1/4 teaspoon of baking soda
1/2 salt
3/4 cups of sugar
1/4 of brown sugar
1/2 cup of unsalted butter, melted
1 large egg
1/4 cup of sour cream
3/4 cup of milk
1 tablespoon of vanilla extract
2/3 cup of colored sprinkles

for the frosting (vanilla buttercream):
1 cup of unsalted batter, softened to room temp
3-4 cups of confectioner's sugar
1/4 cup of heavy cream*
2 and 1/2 teaspoons of vanilla extract

*for this, we actually used a bit more heavy cream because of how thick it was, despite adding in more heavy cream, it was still very thick.  I think we used about a cup in total.*

Prep & cooking:
*turn your oven to 325 degrees*
for the cupcakes:
1. Line your cupcake tins with cupcake liners and set to the side.
2. In the medium mixing bowl, mix together the flour, baking powder, baking soda, and salt.  Set aside.
3. In the large mixing bowl, melt the butter in the microwave.
4. Whisk in the sugar and the brown sugar.  Make sure that there are no lumps, it will be thick and gritty.
5. Add in the egg, and whisk completely, it will help loosen the mixture.
6. Add in the sour cream, and whisk completely.
7. Add in the milk and whisk completely.
8. Add in 1/4 of the dry mix, and whisk it in, do this four times, until the dry mix is completely mixed in.
9. Now add in the sprinkles, but make sure to not mix too much as the sprinkles will bleed into the batter.
10. Pour the batter into the cupcake tins (filling them about 1/2-3/4ths full).
11. Put in the oven for 20 minutes exactly, they should be completely baked.

for the frosting:
12. Beat the softened butter using the mixer, beat for about 3 minutes until it is smooth and creamy.
13. Add the confectioner's sugar, heavy cream, and vanilla extract with the mixer running.
14. Increase speed and beat for 3 minutes.
15. Add more powdered sugar if the frosting is not thick enough, or more heavy cream if the mixture is too thick.


Right out of the oven, see the lighter ones at the bottom?
How it should have looked.


I would have to say that this was an easy recipe, but I messed up by using the wrong sprinkles oops.  I was supposed to use the regular sprinkles that you see on the cupcakes, not the nonpareils.  I used the nonpareils, and they bled like crazy into the batter making it look mostly purple.  They still came out tasting great.  I made some mini ones since I had so much batter left over and Kyle gobbled those up because it was like eating mini muffins, this is coming from the guy who doesn't even like eating sweets.

thirty-five weeks

The belly kind of speaks for itself now.
How far along? 35 weeks - only 2 weeks until early term.
Total weight gain/loss: officially 25 lb, with all of the cookies I've been mowing down, pretty surprised it's not more.
Maternity clothes? heck yes - god I can't even fit in regular clothes anymore.
Stretch marks? So itchy!
Sleep: It goes in and out - I sleep better during the day than at night...too bad I work all day so I can't just nap whenever the heck I want.
Best moment this week: Last week before I go onto Holiday break and I get to sit on my ass for two weeks and get paid to do it!!  So you can imagine how I excited I am
Miss Anything? Yeah, not being pregnant.
Movement: Hiccups - she gets them frequently!  I can always tell where she is by when she gets hiccups.
Food cravings: the other day, I had some coffee - I know so bad, but it tasted so good.  I hadn't had coffee since before I graduated college.  So you can imagine I was long overdue for a little coffee hit.  Seeing as Kyle has coffee EVERY day and I smell it whenever we're home together.
Anything making you queasy or sick: Smells, I'll be glad when I go back to having a shitty sense of smell again.
Gender: Girl
Labor Signs: I think I've been experiencing Braxton Hicks, meaning my body's getting ready.  But honestly I can't tell if it's that or if it's her moving.
Symptoms: GOD PREGNANCY IS KILLING ME.
Belly Button in or out? Flat - not sure if it will pop or not.
Rings on or off? On.
Happy or Moody most of the time: Cranky like a little bitch.
Looking forward to: Christmas is next week...and Kyle's present should be arriving next week, right before Christmas.

Apparently according to a friend, I've dropped.  Baby still isn't head down, I think I would have felt her being head down, but we'll see at this next visit.  All I know is baby girl is kind of stubborn and really likes hanging out sideways.  Still have a hard time breathing, which is why I'm not sure she's dropped.

Tuesday, December 17, 2013

two times tuesday

Who doesn't like brownies?  Crazy people or diabetic people.  I feel bad for diabetic people.  I could never be diabetic - I feel for my Grandma (she used to tell me EVERY SINGLE TIME she would do her blood pressure why being a diabetic was so bad.  She would prick her finger and make me watch her, after that all - she would then offer me some candy). Typical Grandma fashion


People at work are complaining I'm trying to put them in a diabetic coma - oops.  Here is Two Times Tuesday's Brownie Bites .

Items you will need:
for the brownies:
8x8 baking pan
Pam baking spray
1 sauce pan
1 large spoon

for the dipping:
medium mixing bowl

Ingredients you will need:
for the brownies:
½ cup unsalted butter
8 oz of Ghirardelli Semi Sweet Chocolate Baking Bars (2 bars) - DO NOT USE CHOCOLATE CHIPS
1 ¼ cups of sugar
3 large eggs
1 teaspoon of vanilla extract
¾ cup of flour
¼ teaspoon of salt

for the frosting:
8 ounces of semi sweet chocolate (2 oz of Ghirardelli Semi Sweet Chocolate Baking Bars)
sprinkles - any types

Prep & cooking:
*pre-heat oven to 325 degrees*
for the brownies:
1. Spray the baking pan with Pam's baking spray.
2. Melt butter and semi sweet chocolate in a medium saucepan on medium heat, stirring constantly until the mixture is completely smooth.
3. Remove from heat and let cool to room temperature.
4. Stir sugar into the chocolate/butter mixture until combined.
5. Add in the eggs, one at a time, whisking until smooth after each addition.
6. Now whisk in the vanilla.
7. Fold in the flour and salt.
8. Pour the batter into the baking pan and bake for 35 minutes (or until it passes the toothpick test - mine actually took closer to 42 minutes).
9. Once done, allow the brownies to cool to room temp, and then stick in the fridge for an hour to chill.  I allowed mine to chill for several hours.
10. Once chilled, carefully use a metal spatula, or something otherwise thing

for the frosting:
10. Melt the chocolate chips for about 1 minute and 30 seconds(stop in 30 second increments - to prevent burning).  It may take longer depending on your microwave.

for the dipping:
11. Take the chilled brownie out of the fridge and cut into small squares (it should make about 48 bites).
12. Now dip into the frosting mix and decorate with sprinkles.
13. Place back in the fridge once done and allow it to chill again.


Kyle was actually the one who did most of the dipping, he had a technique, and apparently I'm too slow to keep up.  I put the sprinkles on though.  Kyle loved these.  I always save some for myself or for Kyle in case we want any of the baked goods I make, but usually they end up being carted to the bowling alley for them to finish off.  However, of the ones that I brought home that were pulled before I put them out to eat, Kyle easily ate four of the five brownie bites in one sitting.


Monday, December 16, 2013

monday fun day

I used to think making fudge would be really hard to make.  It turns out that it really isn't.  After reading the instructions and looking at the ingredients needed, this was easy.  Originally I had planned on making chocolate and mint chocolate fudge, but because I was bonehead and forgot to get a second can of condensed milk and only had enough to make one recipe - so you can imagine which one I made.
This week is our last week before we go onto Holiday Break.  Due it to being the last week, and nearly a week from Christmas, I decided to make it special for the people at work, although the likelihood that many people will be there is slim.  The administrative staff will be there, some faculty, but barely any students will be there.  I will be making smaller amounts of baked goods each day to compensate for less people.  If worse comes to worse, it will go to the bowling alley with Kyle.  Got to make everyone fat for the holiday season.
So in honor of it being the last week, I've prepared a whole set of baking recipes to be made - one for each day of the week.  Here we go - Monday fun day - Mint Chocolate Fudge


It is important to use baking chips, they melt better, and they spread easier when you pour out the melted chocolate to make the fudge.

Items you will need:
1 baking pan
2 sauce pans
1 bowl
1 spatula

Ingredients you will need:
2 ½ cups of baking Ghirardelli chocolate chips
1 can (14 oz) of Nestle sweet condensed milk
½ cups of Ghirardelli white chocolate baking chips
1 teaspoon of peppermint extract
4 drops of green food coloring (depending on how dark you want the white chocolate to look)
1 teaspoon of shortening (crisco)
½ cup Andes Cream de Menthe baking chips (it can be more or less, depending on how much you want on top).
Pam's Baking spray

Prep & cooking
1. Line an 8x8 baking pan with parchment paper.  Set aside.
2. Spray paper with Pam's baking spray.
3. In a small sauce pan over low heat, melt ½ cup of the chocolate baking chips with 3/4 cup of sweet condensed milk, stirring occasionally.  Mix until it is completely melted (meaning no chocolate chips are present).
4. Spread melted chocolate mixture into pan and allow to cool while you are making the next layer (use the spatula to make sure that all of the mixture is spread into the pan).
5. In another saucepan, melt white chocolate baking chips and add remaining condensed milk, stirring until completely smooth.
6. Remove from heat and add peppermint extract and food coloring and mix completely, until the mixture looks green.
7. Spread mint layer over chilled chocolate layer - once again, use the spatula to ensure everything is out of the sauce pan.
8. Allow to cool for 5-10 minutes while making the final layer.
9. Melt remaining cup of chocolate baking chips with 1 teaspoon of shortening in the microwave in 30 second increments.
10. Stop the microwave every 30 seconds, but you'll start stirring after you've microwaved for 1 minute and 30 seconds.
10. Stir until completely smooth, and spread over chilled mint layer - use the spatula to spoon it out of the bowl.
11. Top with Andes Creme de Menthe baking chips.
12. Refrigerate at least 2 hours before serving.
13. Cut into squares after setting.
14. After cutting into squares, place in a container and place in the freezer to ensure it completely firms up.


Since I didn't have the 8x8 pan, I had to improvise with a small bread pan, meaning my fudge was super thick but small pieces since I didn't have the large pan size.  I thought when starting this recipe I had the 8x8 pan, so when I already turned on the stove and began the melting process of the first layer, I realized I didn't have the baking pan.  I swear pregnancy brain is really killing me here.   The recipe should have made 24 regular sized pieces, but mine made about 15 smallish sized pieces.


Note:  I've noticed I often refer to use a spatula in many of the recipes I make.  The spatula I mean looks like the one on the left and seriously it is the best item I've had since baking.  I don't know what I would do without it.


This is what my fudge came out looking like.  So not picture perfect compared to Sally's but hey, it still tasted like HEAVEN! - if heaven had a taste, it would taste like this.


Kyle bowls in a league every Monday, so when I do have left over baked goods, he'll bring them in, so that I'm not tempted to eat them and so they don't go bad from sitting.  I saved some fudge for myself, but it ended up being too rich.  Luckily Kyle wanted to bring some of the fudge to the bowling alley so that's where it went.  Along with it, went last week's Mint Chocolate Chip cookies.  His team mate ended up loving the fudge so much, he and another team mate had to argue on who was getting the last piece.  The same teammate ended up taking all of the cookies I had Kyle bring to save for later he loved them so much from the week before.